Well I am finally getting around to posting my first tutorial for March, National Crafting month and it's the 31st! Haha! Better late then never. Not that I haven't been crafting, because I have been working on so many things that are going to be so awesome and I can't wait to share them all with you! But you will have to wait because there is a little something that get's in the way of my grand sewing and crafting plans, it's called life! I know you all understand. But enough chit chat, lets get to the real reason you are here.
I came across a great tutorial on how to make a half square triangle quilt. I wanted to start doing more than just block sewing and thought these triangles looked super cute and easy. And guess what, they are! Because essentially it's like working with blocks. So with out further ado here is my experience with half square triangles.
Quilt Pattern Top- Half Square Hunting (I had this fabric on hand, I bought it years ago and needed to clean out some of my fabric stash)
Finished Quilt Size- Crib Quilt 45"x 60", Finished block size 7"
Equipment List
Rotary cutter (don't give your self a head ache or carpal tunnle, get a nice one it's worth it's weight in gold)
Cutting mat
quilting ruler
Matching thread
Sewing Machine
seam ripper (yes for all those oops that happen, my go to tool)
Iron/Ironing Board
Supply List
2/3 Yard Each of 4 Coordinating fabrics (cottons or flannels, I used flannel)**If you are concerned about messing up when you cut , trust me I have done it, go ahead an get a yard of each.
Thread
Patience :)
Cutting instructions 8" blocks(always pre-wash your fabrics that are cut by the yard because they will shrink, and then press them with a warm iron selvage edges together)
1. Square up your fabric (if you don't know what I am talking about I will post about that soon but for now Google it, my answer to all of life's problems)
2. Cut 5, 8"x wof *width of fabric* strips
3. Cut those strips into 8"x 8" squares
4. Now you should have 15 8" squares of each fabric ( you will only need 12)

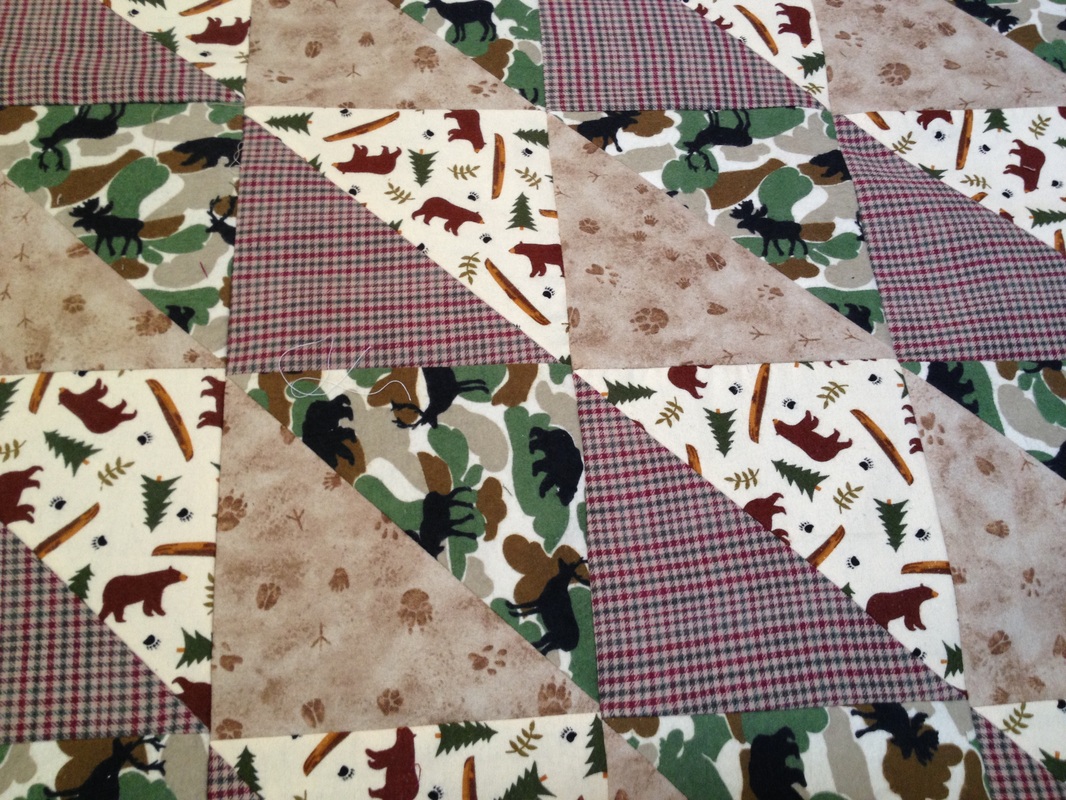
Cutting Instructions for Half Square Triangles
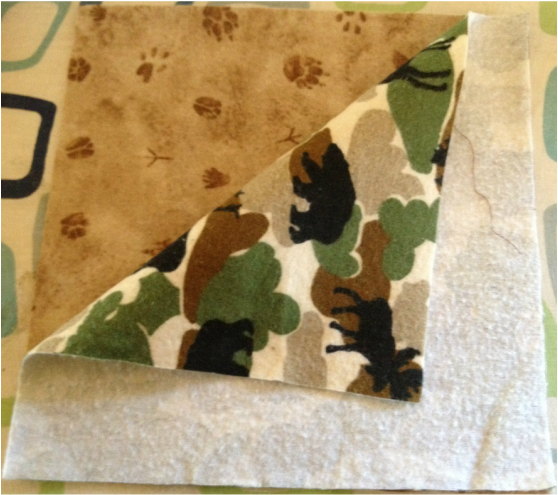
1. Pair up your fabrics. I paired my bear print with my plaid, and the camo with the animal footprint.
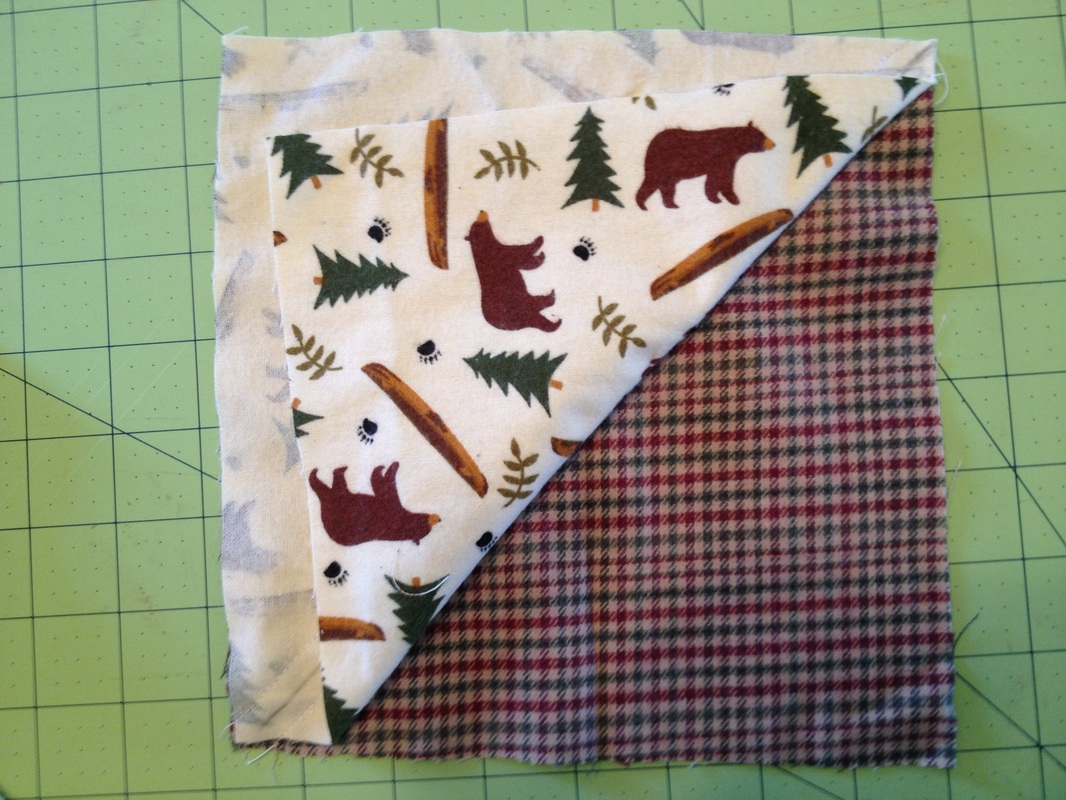
2. Take two squares that are now paired up and put right sides together.
1. Pair up your fabrics. I paired my bear print with my plaid, and the camo with the animal footprint.
2. Take two squares that are now paired up and put right sides together.
3. Now place your square sandwich on the cutting mat and line up the bottom left hand corner and the top right hand corner with the 45 degree angle. Draw a line from corner to corner. I just used a pencil.
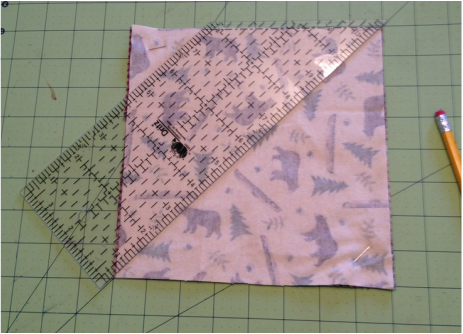
4. Using 1/4" seam allowance (always use this in quilting unless stated otherwise) stitch along the left and the right of the line. Now you have two seams on your 8" square.
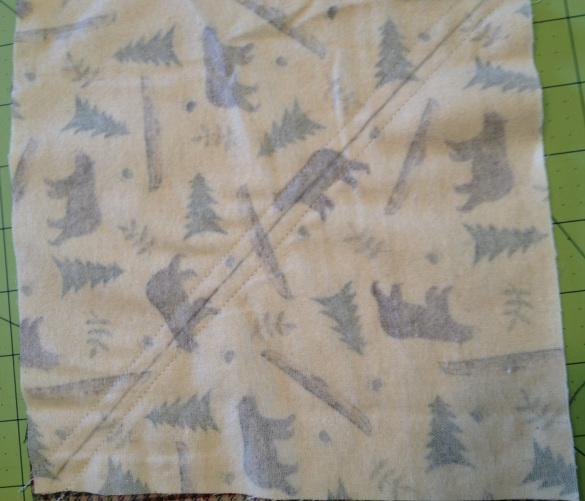
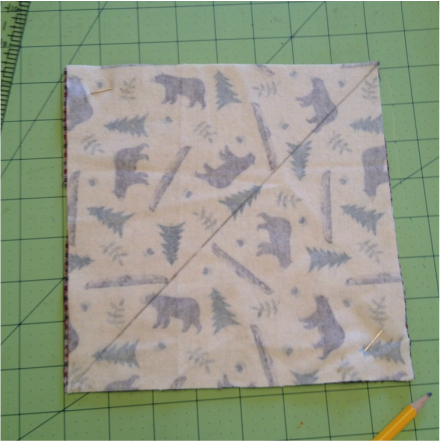
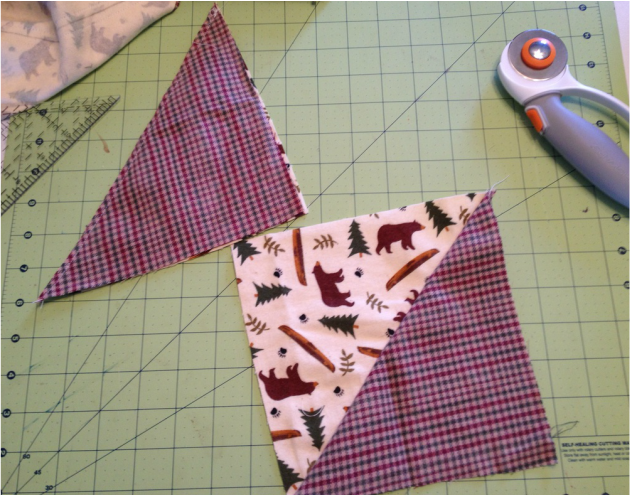
5. Now take your ruler and your rotary cutter, line the square up from corner to corner again on the 45 degree angle, line up your ruler and cut across that line you drew with the pencil (the one that is now between the seams).

6. And voila! You now have 2 half square triangle blocks!
7. Press the seams to one side or press open (if you press to one side make sure you change directions on the different blocks (ex.: bear are to the left camo to the right)
7. Press the seams to one side or press open (if you press to one side make sure you change directions on the different blocks (ex.: bear are to the left camo to the right)
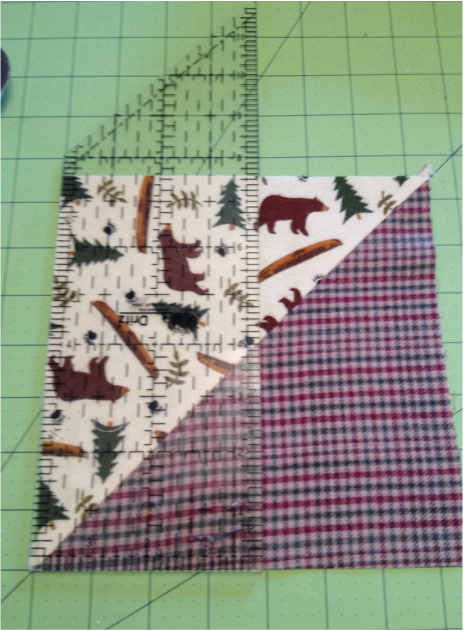
8. After pressing your blocks nice and pretty, it's time to sqaure up your block. I like to line my block up on the 45 degree angle with the seam running the length of the 45 degree line. Then I take my ruler (there are actual quilting block templates you can buy that make this part faster but sometimes I just don't want to spend the money) and make sure all sides of my block are measuring 7.5" now. Cut off the extra fabric hanging out from the corner from seam pressing, and cut any excess making sure your block is now 7.5".
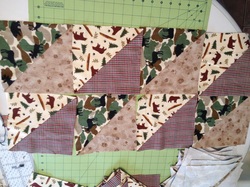
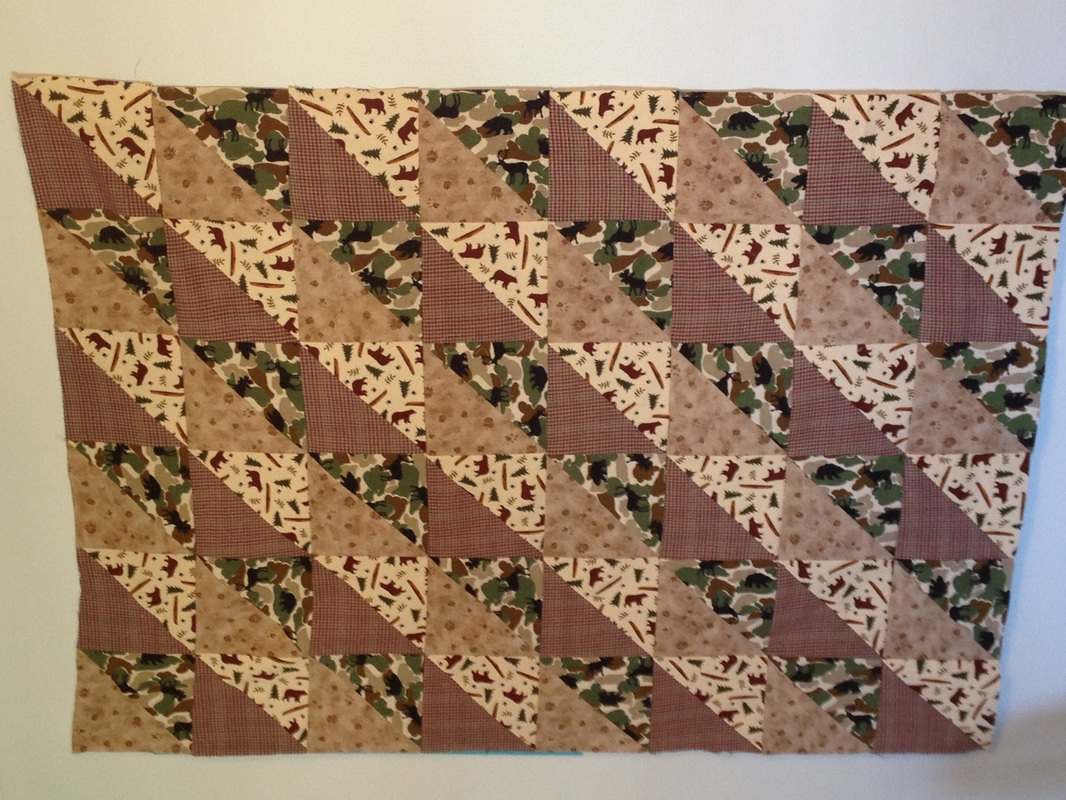
You are now done cutting your blocks for the top of your Half Square quilt! Hard part is over! Now comes the funest part, for me anyway, piecing the quilt together.
Piecing the Half Square Rows
1. This quilt is 6 blocks across by 8 blocks down *tip sometimes laying the blocks out on a floor help you to figure out what looks best for your project.
2.Decide how you want your quilt to look by figuring out the repeating pattern. I chose to keep it simple and do every other block the same. Example. My first row was Camo, Bear, Camo,Bear,Camo,Bear. Second row Bear,Camo,Bear,Camo,Bear,Camo. Then I just alternated rows. You could make pin wheels with these blocks but that's another post down the road.
3. When piecing the blocks together make some more right side sandwhiches. Place right sides together and sew down one side. Repeat so you have 8 strips of 6 hst sewn together. Press seams to one side, alternating left to right with different rows
4. Now take your 8 strips of hst's and sew them together adding on one strip as you go, always sewing right sides together. And always try to line up the seams, this will make your quilt top look professional. Press seams to one side, alternating left to right with different rows.
5. ADMIRE IT!
You are now done piecing your quilt top. Finish as you so choose. I'm not quite done with mine so I will be posting a second part to this tutorial on backing, binding, and then actually quilting your quilt! Awwww sigh of gratitude! I would love to see your projects, share with us on facebook, pinterest, or leave a comment!
Thanks,
Lizzy @ Dorkasaurus Images and Designs llc

 RSS Feed